This post is the second of a complete and free course on Stripe, which is available both on this website as well as on YouTube.
Both the course and its code are open and free. If you enjoy the content, you know you can support the website by becoming a premium member, or buying my book.
On the YouTube video, the content of this post starts at minute 40:06.
Table of Contents
Stripe is a very powerful website and allows us to enable a wide variety of payment methods, as we saw in the previous chapter, but not only that, it also lets us customize the payment screen.
1 - Receiving payments with Stripe
When working with Stripe, we have several ways to manage the user experience through the checkout, or payment screen.
1.1 - Payment links
The first option is the simplest of all. Stripe, when you create a product, whether through the interface or the API, lets you assign it a price. Once you assign this price, Stripe allows you to create a payment link, which lets you specify which fields you want to include in the form, such as address if needed, of course the payment method, quantity of items to sell, if it is a one-time payment, tax identifier for companies, etc.
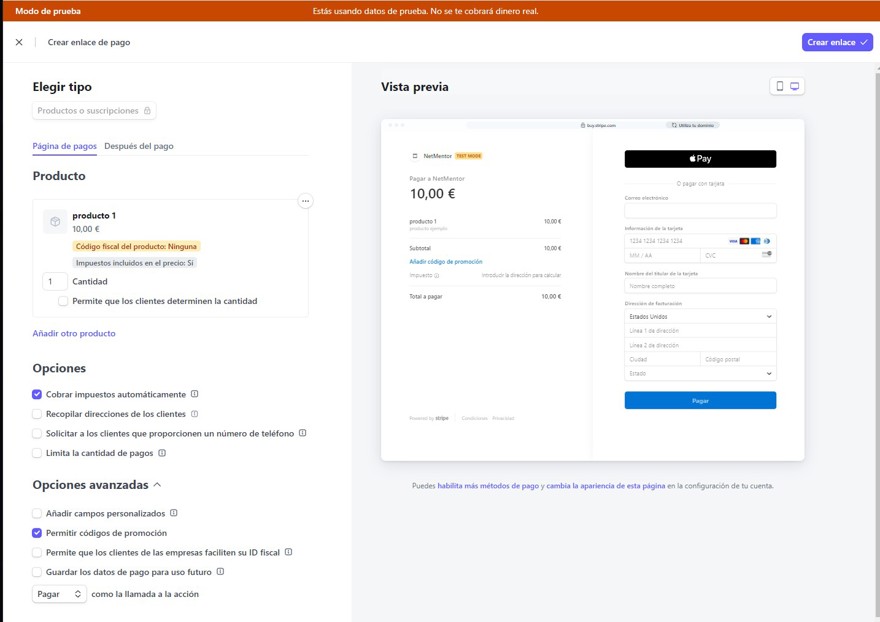
It also allows you to modify the page the user will be redirected to after payment, which can be either the default Stripe page or a page on your own website.
In any case, by clicking the "create link" button at the top, Stripe will give us a URL, which is basically a link to the stripe checkout page.

The biggest downside to this option is that it offers no interface customization, but it is the easiest and fastest. Even if you’re working freelance, it’s very simple to tell your client to pay you like this, as you can configure that payment to include an invoice (for an extra €2).
NOTE: Payment links work to pay for a single product one time.
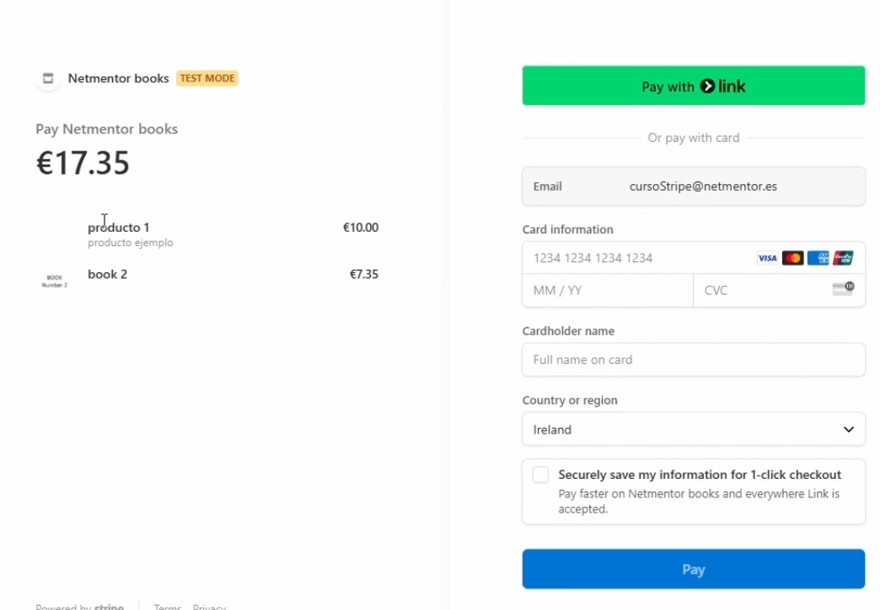
1.2 - Stripe checkout
Stripe checkout is the advanced version of the above. As I mentioned, payment links work for a single product, but what if you have more?
You can build the checkout dynamically from your code, and this is the most popular way to do it.
Basically, your application needs to know what the user is purchasing, and once you have that information, you create a stripe checkout session on your own server, which will be redirected to Stripe for payment.
This payment can contain a single item or multiple items, and also allows you to manage recurring subscriptions or future payments.
Then, when a user pays, Stripe sends a webhook to our website, but we will see that later.
This option is very good and very simple – we’ll see how it’s done later.
1.3 - Stripe elements
In the two versions we have just seen, all the payment is managed in Stripe, both the UI and the logic are handled by Stripe. That means we cannot customize the payment page. For many, not being able to customize is not a problem, but for more established companies it can be.
For this reason, Stripe provides us with a set of components for our interface, and we don't have to do anything server-side. In the interface, we use the stripe.js script and place the HTML we will copy from the documentation:
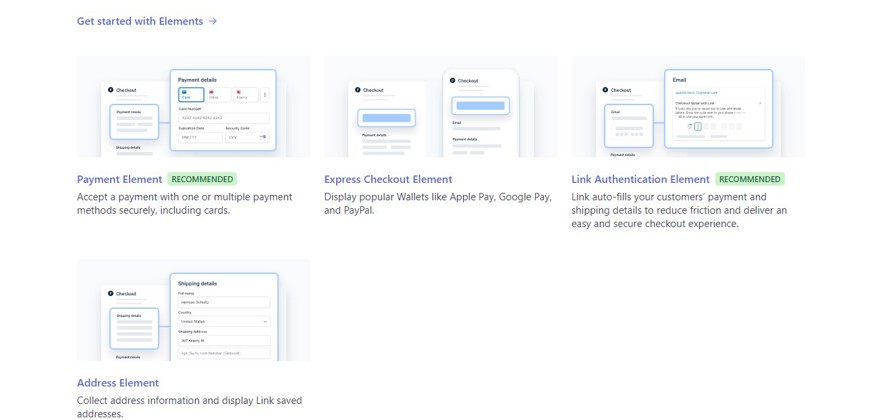
For this option, Stripe has very comprehensive documentation, which I link to here. This way, you can have a fully customized payment interface, but the vast majority of the work is handled by the Stripe SDK.
1.4 - Using the Stripe API
The last option is the most complex but also gives us the most control: using the Stripe API. You can manage the entire payment process with the API only from the backend.
Honestly, in addition to being the most complex and complicated to manage, I think this option is the riskiest, since at some point in the process, customer data will likely pass through our system, and storing it could cause problems.
Very few people will need this method – it’s good to mention it because it exists, but it requires a lot of work.
2 - Registering products in the system
To avoid spending too much time on code, since that's not the focus of this course, I'll summarize how to create products in our system.
As we are using Entity Framework Core with code first, I'll create an entity called products. These products have the following structure.
public class ProductEntity
{
	public int Id { get; set; }
	public string Name { get; set; }
	public string ImageUrl { get; set; }
	public decimal Price { get; set; }
	public string StripePriceId { get; set; }
}
Here, we see the basic elements – id, name, or price – but we also include the Stripe ID. You might think this is the product ID but actually it's not – it’s the price ID, and in Stripe, each price is a different entity, so the same item with two different prices will have two different URLs.
Obviously, you can change the code to support multiple prices in a single product, but I don’t see the need to add that feature in our application.
This model has to be added to the DbContext so we can access it:
public class ApplicationDbContext : IdentityDbContext
{

	public DbSet<ProductEntity> Products { get; set; }

	public ApplicationDbContext(DbContextOptions<ApplicationDbContext> options)
		: base(options)
	{
	}
}
Of course, we have to change the database connection, which is located in appsettings, to the following (if you used the docker compose I showed):
server=127.0.0.1;port=5306;database=bookplace;user=root;password=pass
And use MySQL instead of SQL when registering the DbContext, for which you'll have to install the MySql.EntityFrameworkCore package:
builder.Services.AddDbContext<ApplicationDbContext>(options =>
	options.UseMySQL(connectionString)); 👈
Once you have this, you need to remove any previous migrations (data folder -> migrations), as our database is MySQL and not SQL Server. Personally, I also recommend removing the SqlServer package from the csproj.
Now create the new migration with:
dotnet ef migrations add InitialMigration
We need to ensure our code will run migrations by adding the following instruction in the startup file:
using (var scope = app.Services.CreateScope())
{
    ApplicationDbContext context = scope.ServiceProvider.GetRequiredService<ApplicationDbContext>();
    context.Database.Migrate();
}
And if you run the code, you'll have your new database along with the user tables and the new products table.
Next, we will add a product. For this, I simply created a use case to insert into the database and an API controller to call it. As this is for testing, I have ignored security, but in a production application, it should be included.
public record CreateProductRequest(string Name, string ImageUrl, decimal Price, string StripePriceId);

[Route("api/[controller]")]
[ApiController]
public class ProductsController(CreateProductUseCase createProduct) : ControllerBase
{
	[HttpPost]
	public async Task<bool> Create(CreateProductRequest request)
	=> await createProduct.Execute(request);
}


public class CreateProductUseCase(ApplicationDbContext applicationDbContext)
{
	public async Task<bool> Execute(CreateProductRequest createProduct)
	{
		//TODO: validations ETC but i'm not gonna waste time on that.
		applicationDbContext.Products.Add(new Data.Entities.ProductEntity()
		{
			ImageUrl = createProduct.ImageUrl,
			Name = createProduct.Name,
			Price = createProduct.Price,
			StripePriceId = createProduct.StripePriceId,
		});

		return await applicationDbContext.SaveChangesAsync() > 0;
If we execute a call like this to the API, it will create a record in the database:
{
    "name": "producto1",
    "ImageUrl" : "https://www.netmentor.es/images/book/guia_desarrollo_full_stack.jpg",
    "price": "10.00",
    "StripePriceId" : "price_1PHOvVCNTtv2rbe1aYNW9Hsk"
}
And now we just need to read it in the Front End.
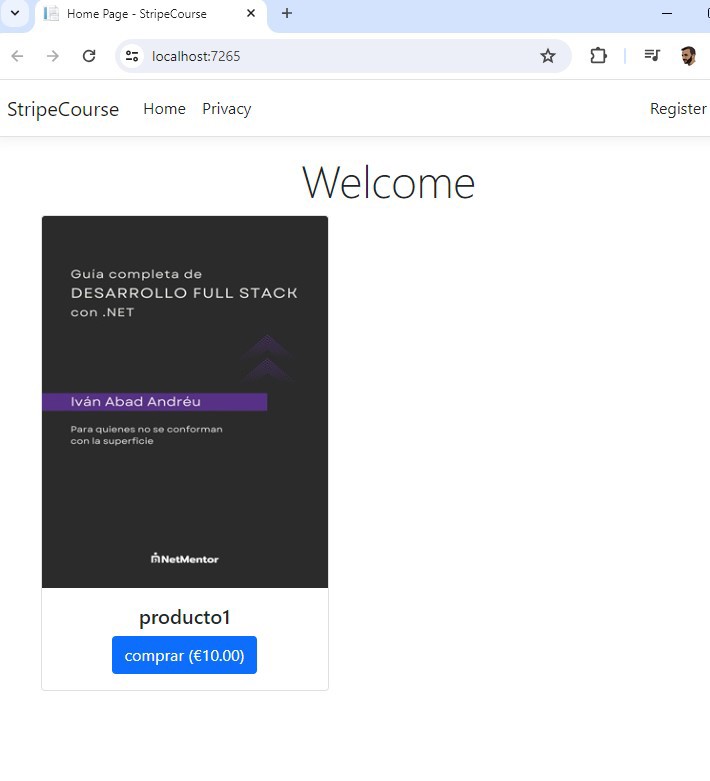
3 - Creating payment links dynamically
But the best way to make payments is through the checkout session Stripe provides. This action can be taken for a single item or for multiple, and it’s the recommended option in most cases.
The only difference when it's a single item or a list is that you’ll need to implement a shopping cart in the Front End, but the rest of the process should be the same.
The first thing we need to do is install the "Stripe.net" package from nuget, as we will use the Stripe SDK to create a payment link.
Depending on the type of architecture you are going to use in your application, it’s possible all communication with Stripe will be done in an infrastructure layer, but if you’re doing this course to experiment, you can do it in the controller itself without any problem.
To continue, we must create a controller that has a checkout method. This method will call the Stripe API (via its SDK) to create a checkout session:
StripeConfiguration.ApiKey = "keygoeshere";

SessionCreateOptions options = new SessionCreateOptions
{
	SuccessUrl = "https://localhost:7265/payment-completed",
	LineItems = new List<SessionLineItemOptions>
	{
		new SessionLineItemOptions
		{
			Price = stripePriceId,
			Quantity = 1,
		},
	},
	Mode = "payment",
};

SessionService service = new SessionService();
Session stripeSession = await service.CreateAsync(options);
There are several things to note in this code.
The first is the API key, this API key is your private key, so you should never show it. In my case, it doesn't matter much because it is the test one and before publishing this course I will disable it, but I recommend storing it in your application's secrets or in environment variables.
Configuration is a static class, so I recommend assigning the key at the start of your application (in program.cs) so it only runs once.
The next thing to note is the SessionCreateOptions object, where we set three properties.
SuccessUrl -> The URL where the user is redirected after a successful payment. Here it’s set to localhost because we’re testing locally. I recommend you create that view.
LineItems -> List of items the user is buying. As you can see, we send the price ID we obtained previously and the quantity. Notice it’s a list, so if you have a cart, there can be multiple items here.
Mode -> This property indicates the checkout mode. Basically, whether it is a one-time payment (payment), a subscription (subscription), or if you are saving user data but paying later, for example a 7-day trial (setup).
The object has many more properties, but these are the key ones for creating payments.
The last line of this snippet returns a Session object, which has a URL that we must redirect the user to.
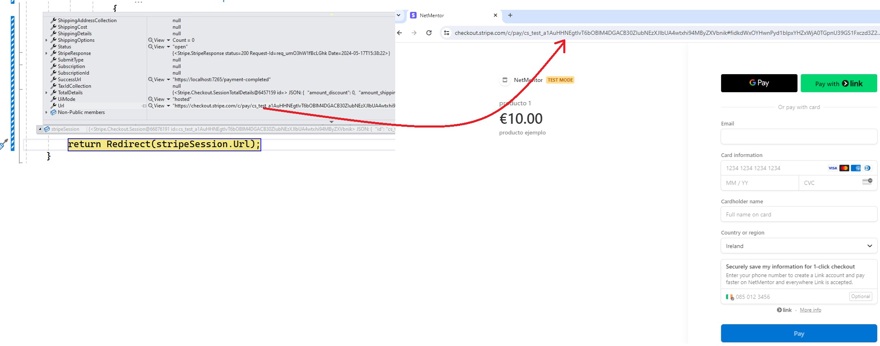
If you fill in the data correctly, once the payment is made, Stripe will redirect the user to the view you indicated (payment-completed).
You can then see the payment in Stripe’s own interface:

However, at this point, the user has paid but has not received the product; in fact, we don’t even know we received the payment. This is where webhooks come in.
