In this post, we’ll see how to upload our .NET libraries to Nuget directly from Github Actions.
Table of Contents
1 - What are GitHub Actions?
Before we get into it let’s understand what GitHub Actions are.
Simply put, GitHub Actions are workflows that allow us to have continuous integration and continuous delivery, as well as testing, deployment, etc. directly from GitHub.
I think it's a great improvement, since personally I never bothered to publish any project to Nuget, mainly because I found it tedious to create the package, log in, etc. But if it can be done automatically, why not?
2 - What is Nuget?
At this point, I understand everyone knows what Nuget is. Nuget is mainly the package system of .NET, where all developers who create libraries upload their content.
You can find it in Visual Studio when you right-click -> manage nuget packages.
3 - How to upload a package to Nuget?
To upload a package to Nuget, the first thing you need is an account on www.nuget.org, since these packages will be tied to your user.
Once you have the account, you need to make sure that the package is created with all the needed info like your name, license, repository, etc. You'll have to specify that.
So, head over to the library you want to package and open its .csproj file.
Inside the <PropertyGroup> tag where you specify the TargetFramework, add the rest of the info as follows:
<PropertyGroup>
    <TargetFramework>netstandard2.1</TargetFramework>
    <RootNamespace>Netmentor.DiContainer</RootNamespace>
    <TreatWarningsAsErrors>true</TreatWarningsAsErrors>
    <Nullable>enable</Nullable>
    <Authors>Ivan Abad</Authors>
    <Company>NetMentor</Company>
    <Version>1.0.2</Version>
    <PackageLicenseExpression>MIT</PackageLicenseExpression>
    <RepositoryUrl>https://github.com/ElectNewt/Netmentor.DiContainer</RepositoryUrl>
    <Description>Dependency container which allow to build modular applications</Description>
</PropertyGroup>
3.1 - Create a Nuget package from the command line
Now, let's create the package. The first time you publish a package, you have to do it manually because Nuget requires the initial upload to be manual, letting you change the associated info or cancel the upload if needed.
To do this, open powershell in the folder where your .csproj is and run the following command:
dotnet pack -c ReleaseIt's important to add -c Release, so the package is built with the release configuration. When you use debug mode, the compiler creates extra info for debugging; the same applies here for packages.
The package will be created in ~\bin\Release\ and you just need to drag it to the drag and drop upload window on Nuget.
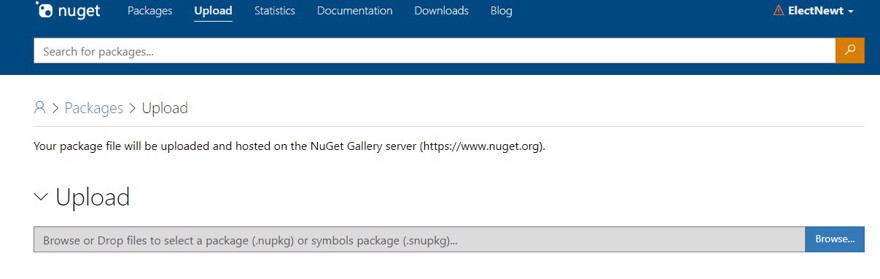
You’ll be prompted to verify the information you added to the .csproj file above. Scroll down and submit.

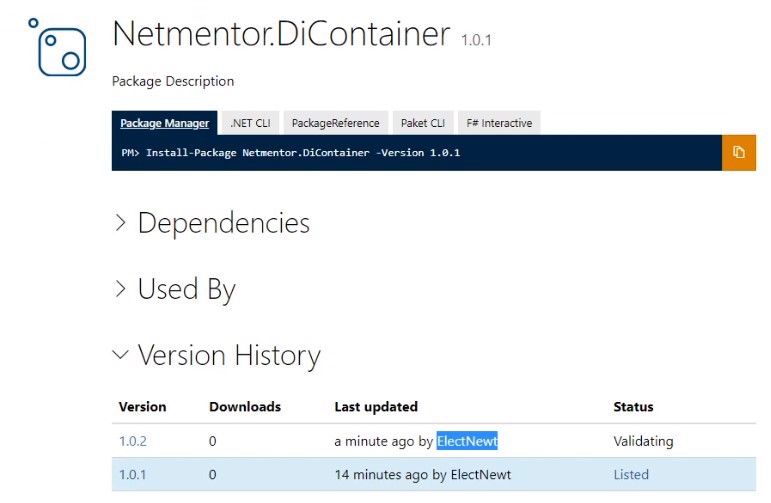
Now, as you can see, the package is already available in your packages window.
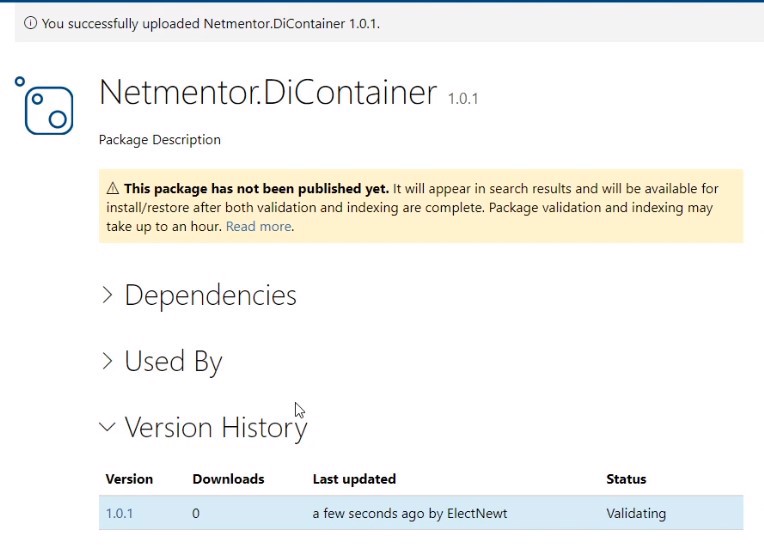
Note: In this example, updating the package version automatically is not covered, so for this commit I updated it manually (version 1.0.2).
4 - How to upload a package to Nuget with GitHub Actions
We’ve seen how to do it manually, but manual uploading is a chore. We want to automate it.
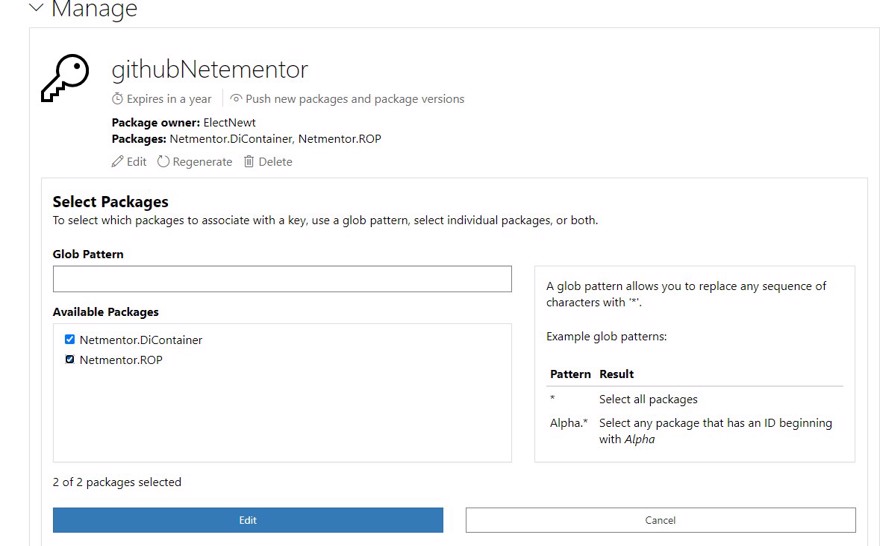
First, we need to allow other applications to connect to Nuget on our behalf. For this, Nuget provides an API key, which you can find in the top menu (where your username is) by clicking on API Key.
You can create a new one or modify an existing one. I have one for GitHub access; I just update it to permit the new package.
Now we need to link GitHub. Go to your repo, click on settings, and then to secrets.
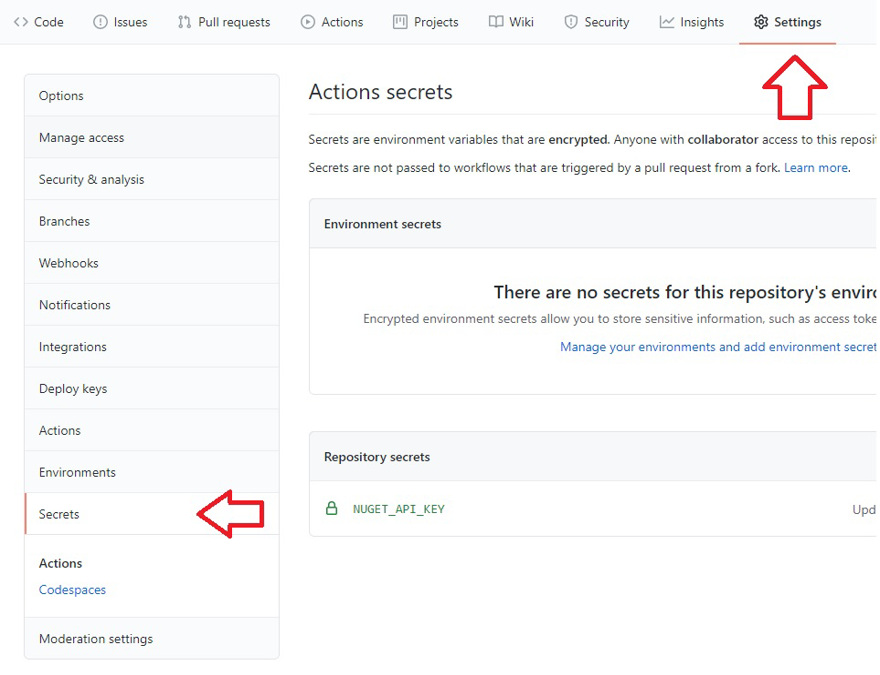
There, add the code given by Nuget’s API key. In my case, I called it NUGET_API_KEY but you can name it however you want.
4.1 - Add deployment to Nuget in a GitHub Action
Now, we just have to add the action to publish the library on Nuget. We’ll use GitHub Actions for this.
I won’t go into too much detail about GitHub Actions here, but when you have a .NET project and go to “actions”, a default workflow appears. This workflow has build + test, which is perfect as a basis for what we want to do.
So, let’s add it.
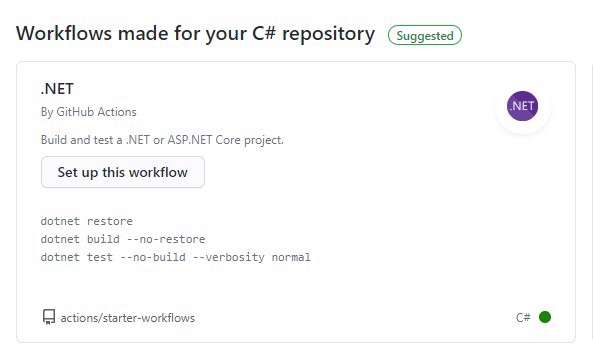
As I mentioned, the workflow does the build and then the tests, which is great because it ensures everything passes before deploying to Nuget.
At the end of the file, add this new step:
- name: Despliegue en nuget
    uses: brandedoutcast/[email protected]
    with:
    PROJECT_FILE_PATH: src/Netmentor.DiContainer/Netmentor.DiContainer.csproj
    TAG_FORMAT: '*'
    NUGET_KEY: ${{secrets.NUGET_API_KEY}}
Here, we tell it to use a specific package to publish to Nuget, as well as info like our .csproj path and the Nuget API key via secrets.
Once saved, commit your changes and the workflow will execute, you’ll see it running.
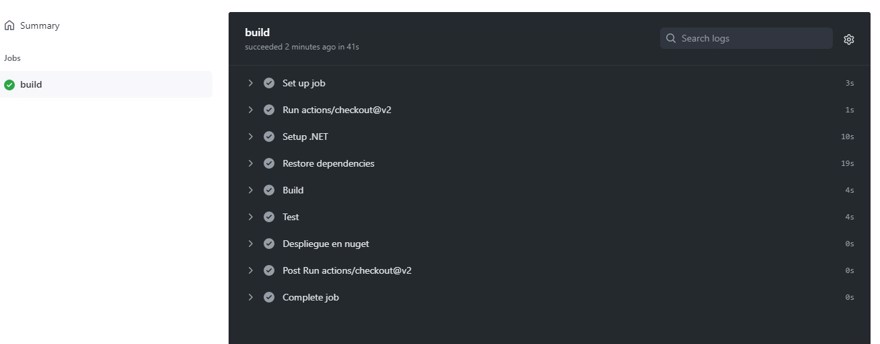
As you can see, everything has a green checkmark meaning all went as expected, so if you go to Nuget you’ll see the second version published.
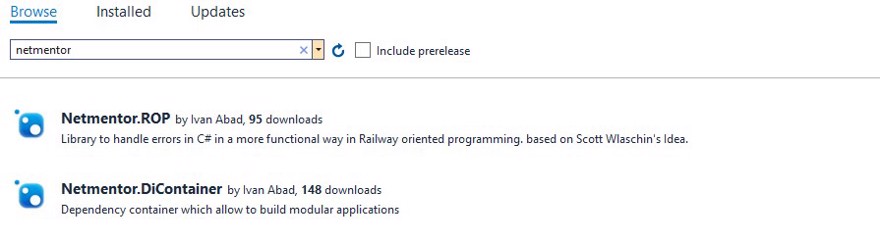
Finally, if you go to any Visual Studio project and search in Nuget, you’ll also see it available there.
Conclusion
- In this post, we’ve seen how to create and deploy Nuget packages directly from GitHub Actions.
- Personally, I think it’s a big improvement to GitHub since many developers will start publishing their open source projects to Nuget automatically.
- Finally, I have to say it helps me a lot, since these are packages I use in multiple projects and used to just copy and paste them around, now I always have the latest version available.
