Note: Because "someone" found the project on GitHub and sent a copy to my own company for a similar position, I have decided to remove the code from GitHub. It is now available on Mega through the download link on the right (below on mobile versions).
In this post, we are going to see the continuation of the previous posts where we looked at what Docker is, as well as an example of how to run our API in Docker. And how to run our integration tests against a database hosted in Docker.
Here, we are going to see the continuation, and how to implement a multi-container system in our application.
Before we continue, note that docker-compose is automatically installed when you install Docker on your machine, whether it’s Windows or Mac.
Note: The code is available on GitHub, it is from an interview I did for a company.
Table of Contents
1 - What is docker compose?
As we saw in the previous post, to run our application in Docker we create a file called Dockerfile which contains different configurations. These configurations vary depending on what we want to put in the container, because it’s not the same to run a website as a database.
This process, creating all the Dockerfiles and running them, can be quite tedious. A medium-sized application will likely have a frontend, a backend, maybe some background workers, as well as the database, a caching system, queue system or message-broker, etc. Each service is a different container.
Therefore, creating multiple Dockerfiles and running them all in a script gets long and messy.
This is where docker compose comes into play, which is a tool that allows us to define and run multiple containers in Docker. These multiple containers are defined in a file called docker-compose with the .yml extension.
So, Docker compose is a container orchestration tool.
2 - Configuring a docker-compose file
To create these containers, we must do so in our docker-compose.yml file, generally, in projects it is placed at the root of the repository, and personally, I always put it there.
The file consists of several parts:
version: We must specify which version of docker-compose we are going to use.- For example, it’s important to keep in mind that nowadays for relating containers you use the links configuration, but previously, it was necessary to create a network in which all containers were in the same network.
services: This is where we will indicate the different services we are going to use, and each one will be turned into a container.volumes: We can define the volumes section here, which means that the container’s data will be preserved when we destroy it, so that the next time we create it, all that information is still there (for example, database information).
version: "3.8"
services:
    rabbitmq:
       ###Container configuration
    mysql:
       ###Container configuration
Each of these services has different configurations, but all share the same structure:
container_name: name for the container, by default Docker gives ugly names, and I personally prefer clean names.image: We specify which image we will use. These images are commonly stored on the Docker website, though many companies have their own. It is normal to go online and look for the one you need (just likeFROMinside the Dockerfile)build: Optionally, instead of “image”, we can specify build, which is the path to a dockerfile with the configuration.
ports: The ports that are mapped from outside the container to the inside.- for example, in the case of mysql, it uses port 3306, but if we already have mysql installed on our machine, we cannot use that port as it would call the mysql of our machine, not the one in the container. That’s why we can specify
4306:3306, which means when you access port 4306 on your machine it redirects to 3306 in Docker.
- for example, in the case of mysql, it uses port 3306, but if we already have mysql installed on our machine, we cannot use that port as it would call the mysql of our machine, not the one in the container. That’s why we can specify
environment: We can send environment variables to our container, normally the images use these variables for distinct configuration matters, for example in mysql, we can define a default user and password.- Each image/service has its own variables, read the documentation to know which ones to use.
volumes: As mentioned before, this section is for data persistence when creating and destroying our container. It also lets us send additional data, often used for initial configuration.- depends_on: sometimes we have a container that depends on another, here is where we indicate it
links: In some cases, we need several containers to communicate with each other, that is, to have access between them. Previously, this was done with networks, but now it is done with the link property; you just need to indicate it.
Here we can see a docker-compose.yml file that contains
- MySql (database)
- RabbitMQ (message-broker)
- API in .NET
- Backgroundworker in .NET
version: "3.8"
services:
    rabbitmq:
        container_name: rabbitmq
        ports:
            - 5672:5672
            - 15672:15672
        volumes:
            - ./Tools/RabbitMQ/rabbitmq.config:/etc/rabbitmq/rabbitmq.config
            - ./Tools/RabbitMQ/definitions.json:/etc/rabbitmq/definitions.json
        image: rabbitmq:3-management
    mysql:
        container_name: mysql
        ports:
            - 4306:3306
        environment:
            - MYSQL_DATABASE=retailim
            - MYSQL_ROOT_PASSWORD=test
        volumes:
            - ./src/Database/:/docker-entrypoint-initdb.d/
        image: mysql:5.6
    webapi:
        container_name: webapi
        ports:
            - 8080:80
            - 8081:443
        environment:
            - ASPNETCORE_ENVIRONMENT=Production
        build:
            context: .
            dockerfile: ./src/RetailIM.WebApi/Dockerfile
        restart: on-failure
        depends_on:
            - rabbitmq
        links:
            - rabbitmq
    orderms:
        container_name: orderms
        ports:
            - 8180:80
            - 8181:443
        environment:
            - ASPNETCORE_ENVIRONMENT=Production
        build:
            context: .
            dockerfile: ./src/RetailIM.OrderMS/Dockerfile
        restart: on-failure
        depends_on:
            - rabbitmq
            - mysql
        links:
            - mysql
            - rabbitmq
For today’s example, we are only interested in MySql and RabbitMQ, so we can delete the others.
2.1 - Application context
To give some context, the application has the following architecture:
It consists of an application that is an API which receives external requests through the web by HTTP.
These requests go to a message-broker (RabbitMQ in docker) and another application is constantly reading the queue and inserting them into the database (mysql in docker).
In our integration test, we want to test all the functionality, so we insert the data directly from the test to the controller and manually execute the service that reads the queue, but neither the queue nor the database are triggered manually. This part we have to replicate with Docker.
3 - Setting up containers with docker-compose
To set up these containers, you simply go to the folder where your docker-compose.yml file is and run the following command in the terminal:
docker-compose up -dNote: We run the -d option so the containers run in the background (and are not on your terminal window).
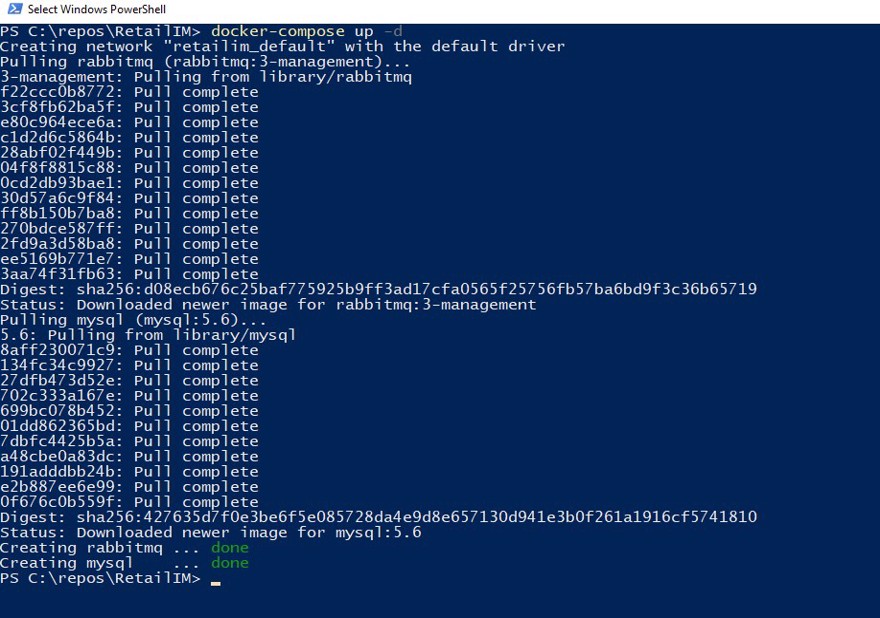
We can see our containers running properly both if we run the command docker container ls in the terminal or if we go to the Docker desktop application and click on containers.

To dismantle the containers and remove them from our system, we must run the following command:
docker-compose down
4 - When to use Docker Compose
4.1 - Test production environment
A use case could be to deploy all our environment on a test server or even in production, but in serious enterprise applications, you will never see this.
There are simply better alternatives, such as Docker Swarm or Kubernetes, which is what I personally use at work.
The main reason is because docker-compose is a single-host orchestration tool. If you want more than one host or different configurations like replicas or scalability, you need to use Docker Swarm or Kubernetes.
It might be that a very small company or someone on a personal project uses docker-compose in production, but that’s not usually the norm.
For example, this website could be set up with docker-compose and there would be no difference for the user or in performance.
4.2 - Automate testing with docker compose
In this scenario, I believe docker compose is the king for including our integration tests inside our continuous delivery and continuous integration process.
This is because docker compose gives us a very simple way to replicate fully isolated environments, which is ideal for running our tests.
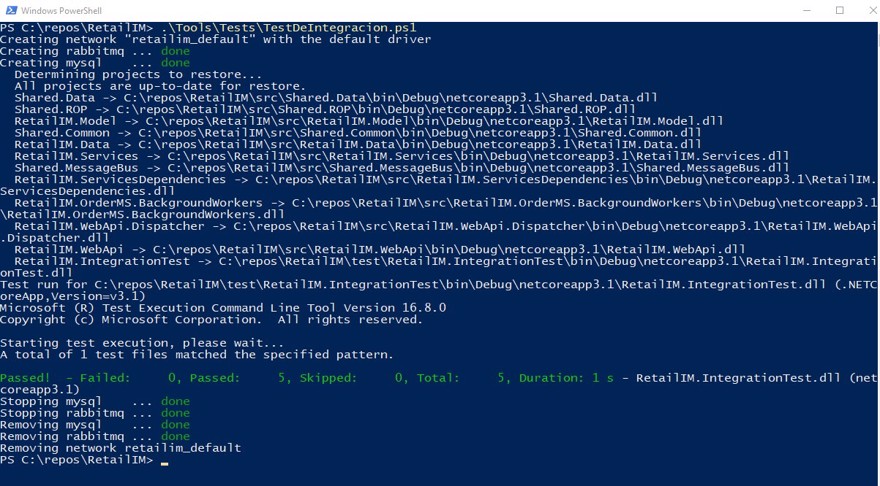
We simply need to have a script that runs in the CI/CD pipeline that contains the instruction to start the containers, run the tests, and finally destroy the containers:
docker-compose up -d
dotnet test ./test/RetailIM.IntegrationTest/RetailIM.IntegrationTest.csproj
docker-compose down
Note: inside the script, to ensure that the containers are set up correctly, we can wait a couple of seconds. If the project is large, there’s no need, because while the project is building, the containers will be ready, but when it’s small, it may try to start too soon.
Another option is to run the unit tests between setting up the containers and the integration tests, which gives enough time for everything to initialize.
And if we run the script, we can see the result:
Conclusion
Personally, I use docker compose in my day-to-day work at the office as well as for personal projects or interviews (today’s example is from an interview).
It is a very useful tool that lets us run integration tests in isolation, which is crucial, especially in our CI/CD process, since results will be exact and reliable.
Also, setting up and tearing down the whole environment takes just a few seconds and everything is automated.
Forcing code to pass tests before being able to deploy, especially to production, can save a lot of headaches and hours of work. As we have seen, it is very easy to set up.
