Today we are going to look at different tricks or techniques that will help us when programming with Visual Studio.
Table of Contents
1 - Code Map in Visual Studio
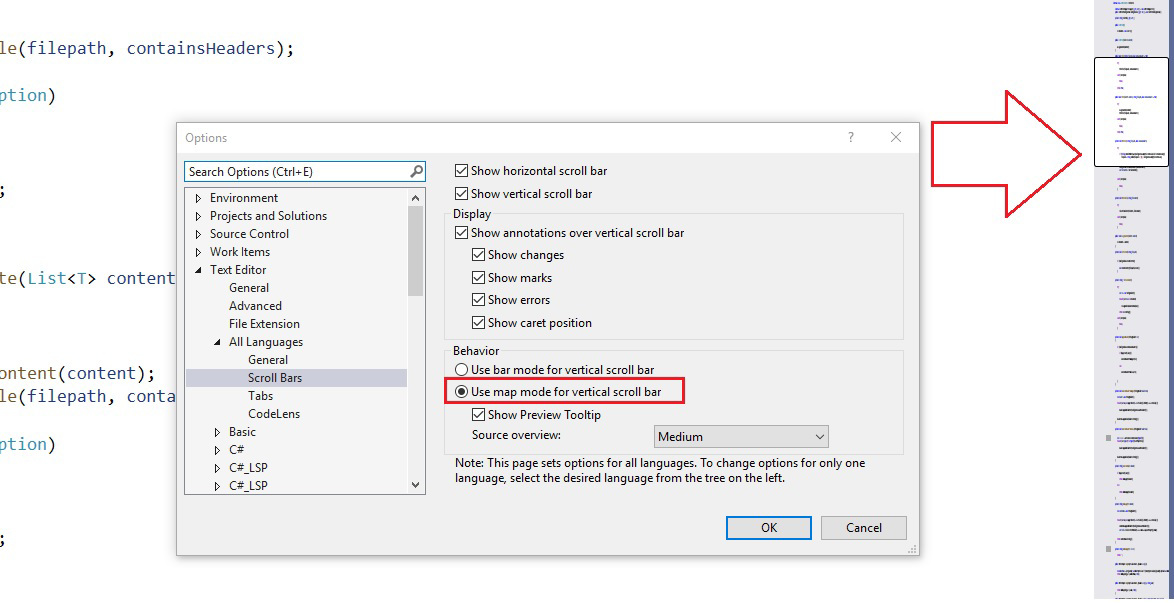
This feature lets us visualize code quickly while we are inside a file, next to the vertical scroll bar.
To enable it, go to Tools -> options -> text editor -> All languages and within this menu, check “use map mode for vertical scroll bar”.
2 - Automatically Comment Code
When we comment code, we usually do it manually, either by using double slashes // or the slash-asterisk to close /**/
/*public CsvWriter()
{
    ListContent = new List<T>();
}*/

//public CsvWriter(List<T> content)
//{
//    AssignContent(content);
//}
We can do this automatically by selecting the lines we want to comment and pressing Ctrl + K, C
If we want to uncomment the code, press Ctrl + K, U
3 - Locate the Current File in Visual Studio
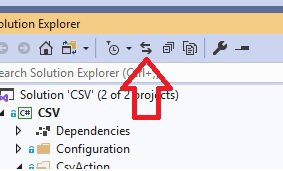
It's common that when we use the feature to search all files in the project for a particular word, and we find it in the file we want, we have no idea where that file is in the directory tree.
To avoid searching manually, Visual Studio includes a feature that lets us find it automatically. Once we are in the file, simply press Ctrl + [, S and the file explorer will highlight that file.
Alternatively, you can use the two-arrow icon, one pointing to each side, which locates the file for you.
4 - Bookmarks in Visual Studio
A feature that almost no one uses, but can be very valuable while programming, is bookmarks.
Bookmarks are indicated in Visual Studio by the bookmark icon.

To add a bookmark, press Ctrl + K, K
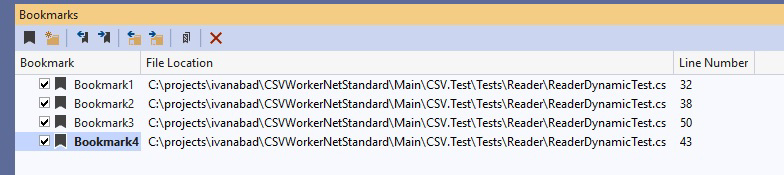
Visual Studio also lets us use the bookmark window by pressing Ctrl + K, W or, alternatively, View -> Bookmark window
Inside the bookmarks window, we can perform different actions such as navigating between them, grouping them by folder, and more.
5 - Simultaneous Line Editing in Visual Studio
A less commonly used feature is modifying multiple lines at once. To do this, press Shift + Alt + Click on each line you want to modify, and Visual Studio will add a cursor to each one.
6 - Preview Feature
Previewing a file can be very helpful, especially if you are looking for something and are not sure where it is.
The preview function will open the file temporarily, only while it is selected in the Solution Explorer.
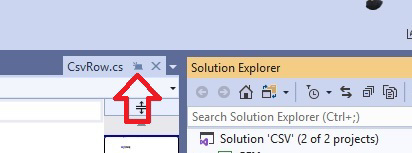
To activate the preview function, press this icon once at the top of Solution Explorer.
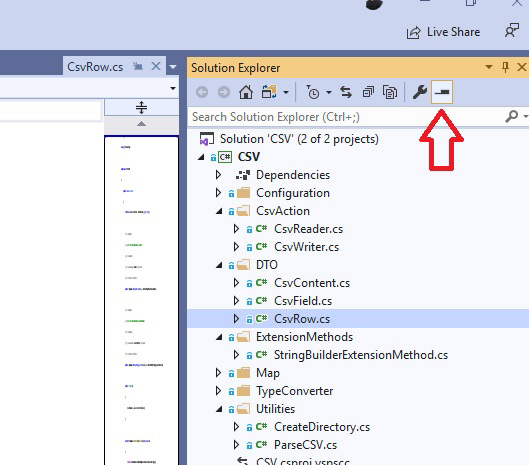
Once you are in preview mode, you can click the small icon inside the tab, or edit the file to turn it into a full tab and stop being in preview mode.
7 - Paste Special in Visual Studio
By default, Visual Studio includes a very useful feature that lets you create classes directly from a JSON or XML.
To do this, copy a JSON, for example the following:
{"menu": {
  "id": "file",
  "value": "File",
  "popup": {
    "menuitem": [
      {"value": "New", "onclick": "CreateNewDoc()"},
      {"value": "Open", "onclick": "OpenDoc()"},
      {"value": "Close", "onclick": "CloseDoc()"}
    ]
  }
}}
Then go to the menu edit -> paste special -> Paste JSON As Classes
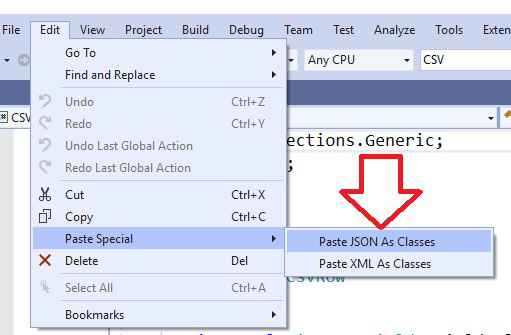
and it will automatically generate the necessary classes.
public class Rootobject
{
    public Menu menu { get; set; }
}

public class Menu
{
    public string id { get; set; }
    public string value { get; set; }
    public Popup popup { get; set; }
}

public class Popup
{
    public Menuitem[] menuitem { get; set; }
}

public class Menuitem
{
    public string value { get; set; }
    public string onclick { get; set; }
}
8 - Move Class to a New File
This example ties in closely with the previous one. Commonly, when we are programming, we create classes or DTOs all together in a single file, and it becomes a bit tedious to create a separate file for each one. For this reason, Visual Studio offers a feature that lets you move a class to its own file.
To do this, place the cursor over the class name and press Ctrl +. which will open the quick actions menu.

If you click on the first option, you'll see it says “move type to Menu.cs”. In this way, Visual Studio creates the corresponding file for that class.
