This post is the second in a complete and free Stripe course, which is available both on this website and also on YouTube.
Both the course and the source code are openly and freely available. If you like the content, you can support the site by becoming a premium member, or by purchasing my book.
In the YouTube video, the content of this post starts at minute 95:20.
Now that we understand how Stripe works, the API, CLI, and even the SDK for code, let's modify our project to automate as many processes as possible.
1 - Creating Products and Prices through the Stripe API
Every time we create a product in the database, it will also be created in Stripe with the price we specified, instead of having to create it manually and link the price.
To do this, we only need to modify the use case as follows:
public class CreateProductUseCase(ApplicationDbContext applicationDbContext)
{
	public async Task<bool> Execute(CreateProductRequest createProduct)
	{
		//TODO: validations ETC but i'm not gonna waste time on that.

		string productId = await CreateProductInStripe(createProduct.Name, createProduct.ImageUrl);
		string priceId = await CreatePriceStripe(productId, Convert.ToInt64(createProduct.Price * 100));


		applicationDbContext.Products.Add(new Data.Entities.ProductEntity()
		{
			ImageUrl = createProduct.ImageUrl,
			Name = createProduct.Name,
			Price = createProduct.Price,
			StripePriceId = priceId,
		});

		return await applicationDbContext.SaveChangesAsync() > 0;
	}

	private async Task<string> CreateProductInStripe(string name, string imageUrl)
	{
		var options = new ProductCreateOptions
		{
			Name = name,
			Images = new List<string>()
			{
				imageUrl,
			}
		};
		var service = new ProductService();
		Product product = await service.CreateAsync(options);
		return product.Id;
	}

	private async Task<string> CreatePriceStripe(string productId, long priceInCents)
	{
		var options = new PriceCreateOptions()
		{
			Active = true,
			Currency = "eur",
			UnitAmount = priceInCents,
			Product = productId
		};
		PriceService priceService = new PriceService();
		var price = await priceService.CreateAsync(options);
		return price.Id;
	}
}
The main difference is that now we get the priceId through the API instead of manually in the browser, as seen in the first chapter of the course. This is essential if you are adding a lot of products.
If you look at the code, we're following the same process as in the web interface: first, we create the product and then the price.
And we can simply create a couple of books using the API we used in previous chapters, and we can see the result:
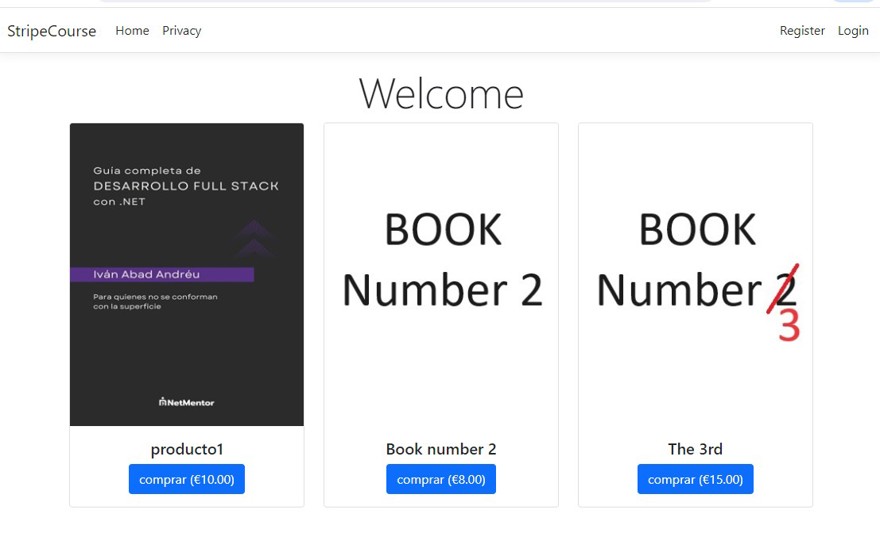
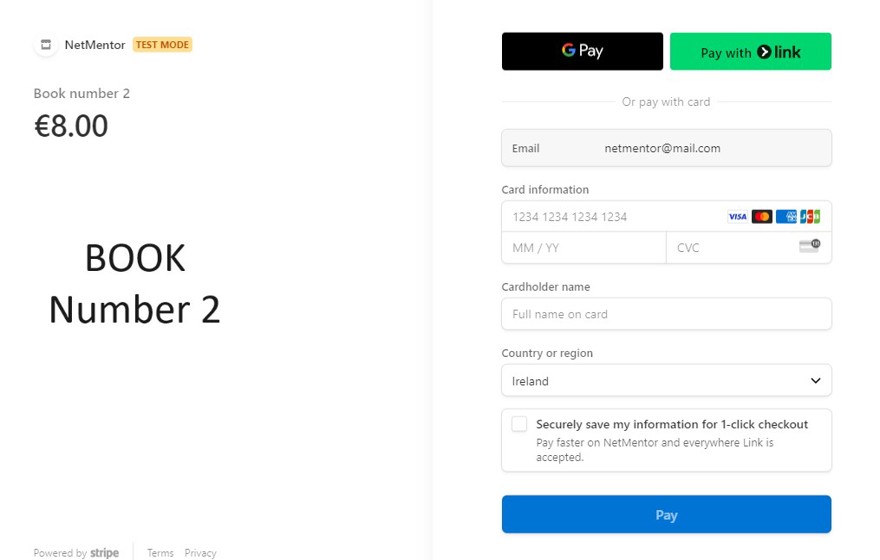
If we click on "buy" we will go to Stripe's payment gateway and be able to make the purchase successfully.
2 - User-based Payments
One of the most important aspects of web applications is being able to have registered users and payments done by those users, so this information can be kept, such as a subscription.
Another very important reason may be to send information from our web to Stripe.
I'm not going into details about how user management works, as there are many ways to do it. I used the one that comes by default in the .NET 8 template, as seen in the first chapter. In production, I recommend having a dedicated user management service.
For this example, I've created a user called [email protected]. Now, when this user makes a payment, the email will be embedded in the checkout process and will not be able to be changed.
SessionCreateOptions options = new SessionCreateOptions
{
	SuccessUrl = "https://localhost:7265/payment-completed",
	CustomerEmail = User?.FindFirstValue(ClaimTypes.Email) ?? null, 👈
	LineItems = new List<SessionLineItemOptions>
	{
		new SessionLineItemOptions
		{
			Price = stripePriceId,
			Quantity = 1,
		},
	},
	Mode = "payment",
};
When we click "buy," we can see that the email is completely locked.